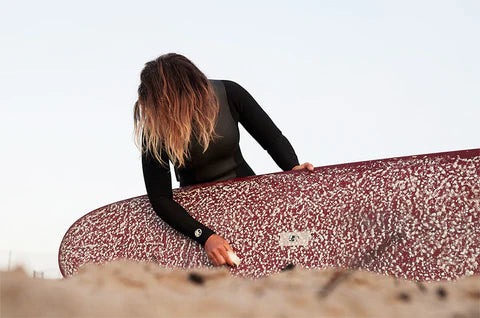
Wax Tips 101: How to Wax Your Board Like a Pro

Surfing is not just about riding the waves; it's about the connection between you and nature and the way you gracefully navigate each wave. To ensure you won't slip as you're dancing effortlessly from nose to tail, it's essential to keep your board properly waxed.
How do you know it's time for a fresh wax job?
If the ocean temperature is changing with the seasons, or you'll be traveling to far away lands with different sea temps on your next surf adventure then it's time for a fresh coat of wax. Follow these simple steps to learn the best way to de-wax and re-wax your surfboard.

The basic formula for a solid wax job is as follows:
1. Remove old wax
2. Apply base coat
3. Apply top coat
Let's dive on in to the specifics on getting the best wax bumps around.
Step 1 - Preparing Your Surfboard: Wax Removal

I like to use the "sun softening" technique to get a board ready for wax removal. Place your surfboard face up in the sun for 5-10 minutes to get the wax nice and soft before scraping. Don't leave it too long especially if it's hot or you are going to have melted wax everywhere.

Then, grab your favorite wax comb. My favorite eco wax comb is the Miniichun Totem Wooden Wax Comb . And my favorite utility wax comb is the Surf Buddy Wax Comb / Scraper because it has a large handle making it easy to use.
Out with the old before in with the new, it's time to start scraping the old wax off. I like to start with the nose and work my way to the tail. If any wax is extra difficult to scrape off, heat some water, pour it over an old rag, and use that to melt any hard to remove wax off.
Step 2 - Wax on: Applying Your Base Coat

First, grab your base coat wax.
We suggest our Tropical Palo Santo scented wax for your base coat wax. But if you prefer to use a traditional base coat we suggest Sticky Bumps Base Coat.
If you are using our Tropical Palo Santo scented wax use the pointed edge of the full bar of wax and draw circles or any design of your liking up and down the length of the board. You can use a firm pressure for this stage of the waxing process.
Then, flip the full bar of wax to the flat edge, use a light pressure and wax from tail to nose up the full length of your board in a diagonal direction.
Now with light pressure and the flat edge of the wax bar wax down the length of your board in the opposite diagonal direction to get those bumps you’re after.
Finally with light pressure using the flat edge of the wax create a large circular pattern up and down the board a few times to get a nice bumpy base coat.
For the best base coat bumps are important! That is why you want to use light pressure to allow the bumps to build up. If you push too hard you will smear your wax and it wont allow the bumps to form.
Step 3 - Wax On: Applying Your Top Coat

After the base coat feels good and you get those bumps, it’s time to switch to your top coat.
1. Select the right wax temperature for your topcoat
It's important to align your wax temp with the current water temperature in your area. If you are in California in the winter months, we suggest COLD, for spring / summer in California we suggest COOL. If you are in the Tropics, you can keep the top coat TROPICAL or use a WARM as your top coat.
2. Apply your top coat with light pressure
Follow that pattern up and down the board a few times with the flat surface of the full triangle to maintain and add to the bumps.
3. DONE!
Now you have a rocking wax job and are ready to trip the aqua blue fantastic like never before.
Don’t forget to wax the nose of the board! We call this an aspirational wax job. Whether you are already nose-riding or dreaming of doing so in the near future, it’s best to always wax up so its ready when you are. It is also great for turtle rolls :)
Our Palo Santo-scented surf wax boasts a 30% larger size compared to its counterparts in the market. Crafted in California with care, it is meticulously designed to offer an optimal waxing surface to cater to all your surfing requirements. Breaking into four smaller triangles, each portion is perfect for sharing with a friend. The soothing aroma of Palo Santo is curated to instill a sense of calm, soothe your nervous system, and cleanse the energy of the lineup.

Now get out there and shred!
Have a beautiful day 🌊
MORE COMMUNITY HAPPENINGS
Wax Tips 101: How to Wax Your Board Like a Pro
Wax Tips 101: How to Wax Your Board Like a Pro Surfing is not just about riding the waves; it's about the connection between you and nature and the way you gracefully navigate each wave. To...


